All Kinds of Help for Businesses
SmartBiz
A secure, all-in-one connectivity solution purpose-built for small business
When you’re running a small business, from your first client of the day to your last POS transaction, your days are nonstop. SmartBiz can keep your business running and productive with exceptional Wi-Fi coverage, robust security, built-in network resiliency, and four distinct Wi-Fi networks to provide safe and secure connectivity for business systems, staff, and guests.
Protect Your Business
Gain peace of mind knowing your data (including POS) and business systems are isolated, secure, and protected
Internet Back-Up
Stay connected and keep business critical devices online even during an outage, avoiding costly downtime or lost sales
Delight Customers & Guests
Keep customers coming back and build loyalty with a branded customer Wi-Fi portal
Boost Productivity
Raise productivity and easily manage staff access with individual passwords and staff network content controls
Manage With Ease
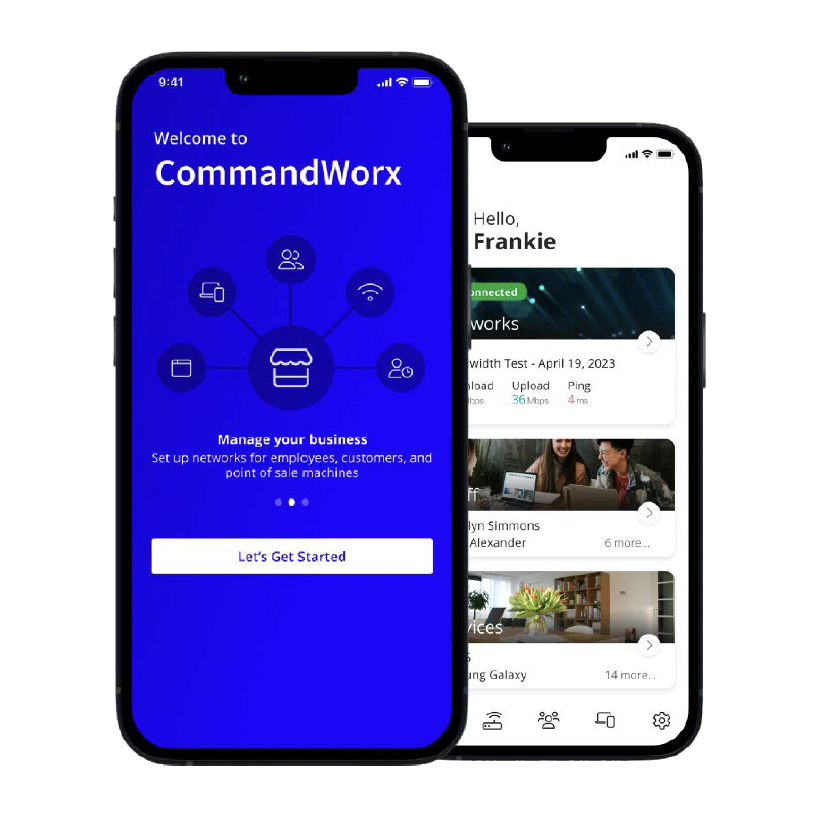
Monitor and manage all capabilities from anywhere – even with limited IT expertise – with the intuitive CommandWorx mobile app
Grow Revenue & Loyalty
Gain valuable guest insights and contact information for marketing purposes f ram the guest Wi-Fi portal
With SmartBiz, built-in networks enhance security for devices, data, customers, and staff.
In today’s digital age, small businesses face increasing cybersecurity threats that can jeopardize their operations and customer trust. In fact, 73%* of small businesses experienced a cyberattack last year. SmartBiz is designed to address these challenges by providing robust security features that keep your business safe and secure.
Network Security Made Simple
With SmartBiz, you can focus on growing your business while we take care of your network security needs:
Ensure that your business’s critical functions are protected by isolating different networks, making it difficult for unauthorized users to access sensitive systems and data.
Network Isolation
Ensure that your business’s critical functions are protected by isolating different networks, making it difficult for unauthorized users to access sensitive systems and data.
Always Up to Date
Stay ahead of threats with automatic updates that provide real-time protection against intrusions, ransomware, and viruses.
Protect Credit Card Data
Help maintain Payment Card Industry Data Security Standards (PCI DSS) compliance, safeguarding your point-of-sale devices and customer data from cyberattacks.
Separate and Secure Staff Network
Provide connectivity for employees’ devices without compromising the security and performance of your primary business functions; and easily manage staff turnover with personalized password access to the staff network
Content Filtering
Protect your staff and patrons from inappropriate content with built-in content filtering features, ensuring a safe and professional environment
CommandWorx App
Monitor and manage your network security from anywhere with the CommandWorx app, giving you peace of mind and control over your business’s cybersecurity.
Get SmartBiz from FMTC
With SmartBiz by, your small business can enjoy big company capabilities with a fully integrated, cost-effective solution that features enhanced security, content blocking, business-built networks, and internet back-up. Get help over the phone or online 24/7. We’re here to answer your questions and help you use your subscription to the fullest.
Frequently Asked Questions
App Setup
From the Apple App Store or Google Play Store
English
French (Canadian)
Spanish
German
Go to Settings
Tap Account and Admins
Tap Invite Admin
Enter their name and email address
Tap Send Invite
Go to Settings
Tap Account and Admins
Tap the Secondary Admin to view their profile
Tap Delete Person and confirm deletion
Reach out to your service provider to request a Primary user change
Network Setup
Go to Networks
Tap the Primary network
Tap Edit
Enter a Network Name (SSID)
Enter a Wi-Fi Password
Select a Security Type
Tap Save
Tap Network Security
See How do I set up the Trusted List?
See How do I set up Skipped Devices?
See How do I set up Intrusion Settings?
Tap Content Restrictions
See How do I set up Content Restrictions?
Go to Networks
Tap the Point of Sale network
Tap Edit
Enable Wired and/or Wireless Network Access
When Wired Network Access is enabled, both Primary and Point of Sale wired devices require manual approval when first connected
Enter a Network Name (SSID)
Enter a Wi-Fi Password
Select a Security Type
Enable or disable the following:
Broadcast SSID – allows devices to discover the Wi-Fi network
Intra-Isolation – prevents devices on the Point of Sale network from connecting to each other
(Only enable if all devices connect to the Internet independently)Inter-Isolation – prevents devices on the Point of Sale network from seeing or being seen by devices on other networks (cannot be disabled)
Tap Save
Tap Network Security
Tap Content Restrictions
Go to Networks
Tap the Staff network
Tap Edit
Choose a Network Configuration:
Shared Password
All employees use the same password
Individual staff profiles are not available
Individual Passwords
Create individual staff profiles with auto-generated passwords
Connected devices are associated with a specific staff profile
Enter a Network Name (SSID)
Tap Save
Configure:
Network Security
- See How do I set up the Trusted List?
- See How do I set up Skipped Devices?
- See How do I set up Intrusion Settings?
Content Restrictions
- See How do I set up Content Restrictions?
Network Access Hours
Always On: network is always available
Every Day: network is available for the same hours every day
Custom: network availability can be customized with a variety of time periods throughout the week
Tap Save
Go to Networks, tap the Customer Portal network, and tap the toggle to Enable Customer Portal
Tap Page Content
Enter a Network Name (SSID)
Enter a Page Heading
Tap Upload and select a Cover Photo
Select the Login Requirements
Email, First Name, Last Name: collect personal information for marketing purposes
None: will not collect personal information
Tap the Anti-spam Content toggle to enable or disable marketing communications opt-in
When enabled, tap the Anti-spam Consent dropdown to select the consent type
Enter the Anti-spam Consent webpage URL or plain text
Please check if Anti-spam Consent is legally required in your locality
Tap the Terms of Service dropdown to select the Terms of Service type
Enter the Terms of Service webpage URL or plain text
Enter Button Text
Tap Save
Tap Branding
Tap Upload to select a Logo image
Enter a Background Color hex code or tap the color block to select a color
Enter a Font Color hex code or tap the color block to select a color
Enter a Primary Button Color hex code or tap the color block to select a color
Enter a Button Font Color hex code or tap the color block to select a color
Tap Save
Tap Network Access Hours
Select a schedule:
Always On: network is always available
Every Day: network is available for the same hours every day
Custom: network availability can be customized with a variety of time periods throughout the week
Tap Save
Tap Network Security
See how to set up the Trusted List?
See how to set up Skipped Devices?
See how to set up Intrusion Settings?
Tap Content Restrictions
Configure content restriction settings
Tap Customer Portal Visitors
To adjust the Login Retention period:
Tap Edit
Tap the Login Retention dropdown and select a retention period
Tap Save
To receive a list of customers who accessed the Customer Portal:
Tap Email Customer List File
Go to Networks
Tap the + button
Tap Add Network
Enter Network Name (SSID) and Wi-Fi Password
Select Wi-Fi Bands and Security Type
Tap to enable or disable the following options:
Broadcast SSID: allow devices to discover the Wi-Fi network
Intra-Isolation: prevents devices on the Custom network from connecting to each other. Only enable if all devices connect to the Internet dependently and don’t communicate with other devices on the network
Inter-Isolation: prevents devices on the Custom network from seeing or being seen by devices on other networks, cannot be disabled
Tap Save
WPA (Wi-Fi Protected Access) is an encryption protocol for Wi-Fi security
Recommended options:
WPA2 (supported by nearly all devices)
WPA3 (supported by modern devices)
Go to Networks
Tap the network you want to modify
Tap Edit
Make changes
Tap Save
Additional Network Settings
Tap the toggle of the following restrictions to enable or disable:
Safe Search: filters out potentially offensive and inappropriate search results
YouTube Restrictions: filters out potentially mature and inappropriate video content
Block DNS over HTTPS: prevents resolving encrypted DNS requests. Does not prevent encrypted website traffic .
Block iCloud Private Relay: prevents routing web traffic through Apple’s iCloud service
Tap Content Restrictions
Tap the dropdown menu to select a preset grouping of content categories
Alternatively, tap the toggle of individual categories to enable restricting that type of content
Tap Applications
Search for specific mobile applications
Tap the mobile application to set restrictions
- Block: total restriction
- Always allow: no restriction
- Allow for: restricted after a set amount of usage
Tap the X to remove the mobile application restriction
Tap Websites
Enter a website URL and tap the + button to set restrictions
Tap Block or Always Allow
Tap the X to remove the website restriction
A list of website URLs that will not be monitored for cyberthreats
Only add sites you trust
Tap Trusted Websites
Tap +
Enter website URL
Tap Save
Bypasses Network Security for selected devices
Skipped devices will not trigger security alerts
Tap Skipped Devices
Select or deselect devices using checkboxes
Enhances cybersecurity monitoring and protection
Tap Intrusion Settings
Enable:
IPS Protocol Anomaly
IPS Port-Scan-Defense
Tap Save
Total viruses detected
Total intrusions
Total web threats
Network Security uptime
Packets analyzed today
Last updated date/time
Customer Portal
• Creating a Terms of Service helps protect your business from legal liability by outlining acceptable and unacceptable use of your Wi-Fi
• Customers will be required to accept your Terms of Service
• The period of time that a user can connect to the Customer Portal without re-entering their information
Staff Management
Add
Go to Staff
Tap +
Enter employee name and email
Select Device Registration type:
High Trust: employees can connect any device
High Control: devices require approval through CommandWorx, limited to 3 devices
Delete
Go to Staff
Tap profile
Tap Edit
Tap Delete Staff
Go to Devices or Staff
Select device or staff profile
Toggle Internet Access
Alerts
Device connectivity
Internet connectivity
Content restrictions
Network security
Date/time and detailed context
Go to Settings
Tap Alerts
Enable or disable Push Notifications
Toggle individual alerts
- You will receive a Security Alert when SmartBiz has automatically blocked a cybersecurity threat
- You do not need to take any immediate action, but it’s recommended that you use the information in the Alert to investigate what triggered the threat and take any further action to prevent another occurrence
- Review the details of the Security Alert to better understand what is triggering the Alert
- If you trust the website that is triggering the Alert, you can tap Add to Trusted List to stop scanning traffic from that URL
- If you are concerned about the website or associated device, it’s recommended that you disconnect or power off the device and seek additional help
Devices
- Device Type
- Gateway/Mesh it’s connected to
- Download and Upload speed from most recent Bandwidth Test
- Wi-Fi protocol, Band, Channel, and Efficiency/Quality
- IP Address
- Vendor (Manufacturer)
- Model
- Go to Devices and tap the + button
- Devices can be added by entering the Network’s Wi-Fi credentials on the Device or using WPS
- To add via Wi-Fi credentials:
- Tap the dropdown and select which Network you want to add the Device to
- Connect the Device using the Network Name (SSID) and Password
- To add via WPS (Devices page):
- Tap the dropdown and select which Network you want to add the Device to
- Tap the Connect button to enable WPS for 2 minutes
- Press the WPS button on the Device you want to add to the selected Network
- To add via WPS (Point of Sale Network)
- Go to Networks and tap the Point of Sale network
- Tap the Connect Device via WPS button to enable WPS for 2 minutes
- Press the WPS button on the Device you want to add to the Point of Sale network
- Go to Devices and tap the unapproved Device
- Tap Approve Device and tap Okay
- If the approval was successful, it’s recommended to unplug and reinsert the Device’s Ethernet cable to
ensure it’s working properly - If the approval was unsuccessful, tap Approve Device again or unplug the Device’s Ethernet cable for a
few minutes and plug it back in to trigger another approval request
- Go to Devices, tap the Device, and tap Edit
- Enter a new Name and tap Save
Go to Networks and tap Network Map under Shortcuts
- Go to Networks and tap the Equipment tab
- Tap the Gateway or Mesh Satellite device
- Tap Reboot and tap Yes, Reboot to initiate rebooting the device
Network Resilience
- Network Resilience enables support for a secondary Internet connection that can be used if there is an
unexpected and extended outage of the primary connection - A secondary device is required, most commonly a cellular hotspot or smartphone
- Network Resilience will detect when the primary connection stops responding and automatically
switch to the secondary connection in approximately 90 seconds - When the primary connection is restored, Network Resilience will automatically switch back in
approximately 90 seconds
- Any device that offers a Wi-Fi connection, such as a cellular hotspot, a smartphone with hotspot
support, or a nearby Wi-Fi router with a separate Internet connection - SmartBiz also supports a wired secondary connection, reach out to your service provider to learn if this is an option for you
- Go to Networks, tap on Network Resilience, tap on Select a Different Failover Device
- Tap a different Failover Device SSID, input its Wi-Fi credentials, and tap Connect to Hotspot